rotors and all

Thursday, October 22, 2020


It really ties the nose together.

Friday, September 23, 2011


I realized this morning that I have a picture of the source of my oil leak on first start. The circled fitting is the one I forgot to torque.

This is also a great chance to show off the braided oil lines I had made at American Hose and Fitting. Nice finding a local shop that's willing to try something, even when the word "Rotary" is used in conversation.

Thursday, September 22, 2011

Success!!!

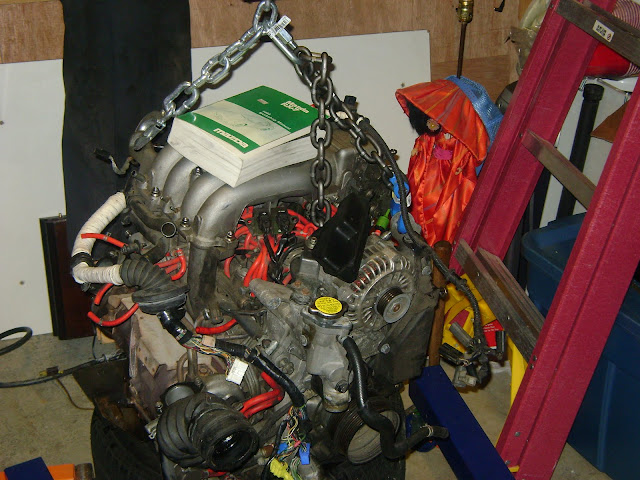
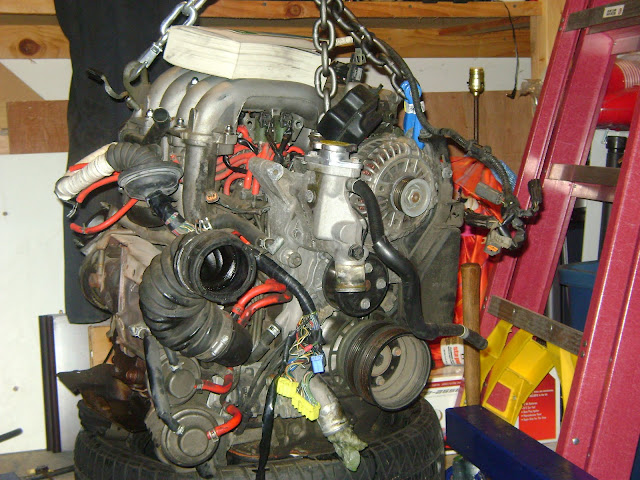
I was finally able to start the car for the first time last week. Sat down, key in hand, took a couple deep breaths, and fired it up. Started on the 1st try. It smoked horribly to burn off all the extra oil / assembly lube / never sieze. Poor Riley said the car scared her, because it was making so much "Spooky Sauce".

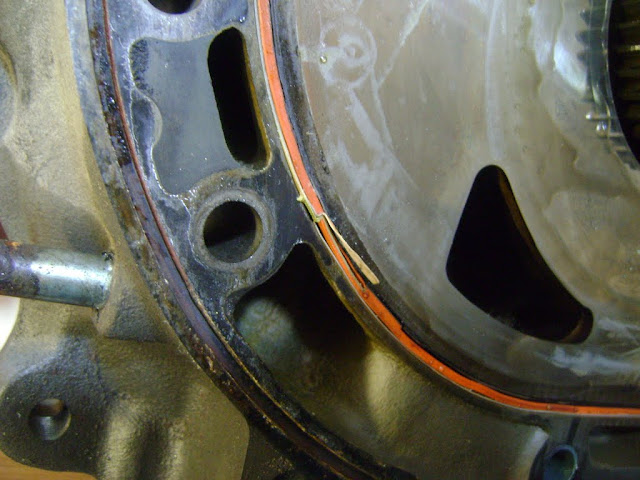
Once the car was warmed up, I started looking UNDER the car, and saw a good sized puddle of oil on the left side of the engine. I poured over the shop manual a bit, and realized that there's only one oil fitting anywhere near the puddle, but that there was no way I could get to it that night.

Next evening, I pulled the PS pump back off, managed to get a stubby wrench on the fitting, and sure enough it was still loose. I remember now that I had torqued it down at least three times during assembly, only to find one more wire / vaccum line / etc that had to be routed under the hard-pipe, so I decided I might as well just finger tighten it until I was sure I wouldn't be removing it any more...then completely forgot about it.

I picked up a transit permit for Monday and Tuesday earlier this week, and managed to drive almost 150 miles, including a failed trip to the emissions test. Hopefully Saturday I'll be able to swap in the stock ECU and some new plugs, and give the test another try now that I'm on fresh gas.

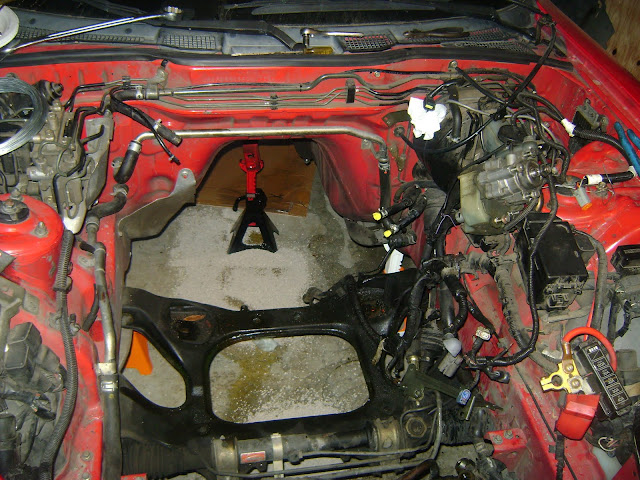
I still have an issue with the cooling system not pulling water back in from the overflow bottle, so I'm going to have to replace the line from the bottle to the AST, and probably worth replacing the AST while I'm at it, but the important part is that the engine is back in the car, and runs!

Monday, September 12, 2011

As of yesterday evening, the car is almost completely reassembled, and less than 2 years after initially starting the rebuild.

At this point, all that is left is:
secure ECU and put passenger side kick panel back in to place
insert shifter into transmission and put interior trim back into place
fill radiator
fill transmission
connect battery
flush brake / clutch fluid

Battery and transmission gear oil have shipped.

Tuesday, April 6, 2010

Engine is apart, picked up a parts washer

I finally had a chance to remove the flywheel, and the engine is completely apart now. I made an origami seal case, as I didn't really want to spend the $60 for a little wooden box.

Thankfully, the internals don't look as bad as I had feared. Every water seal was bad, but there doesn't seem to be any damage to the housings, and the rotors while covered in a thick layer of carbon, don't seem to be too bad.

I bought a parts washer from Harbor Freight, thinking I could just dump my 5 gallon jug of solvent in and move on, but after putting it together realized the washer was not made for petroleum based solvents. Off I went to Lowe's for 4 gallons of Simple Green to mix with water for a water based solvent. I think I'm going to be going back and forth between the two...washer for most of the big parts, and jug for the rotor faces. The SG doesn't do much to the carbon, unfortunately.

Tuesday, February 23, 2010

last weekend's progress

The engine is nearly stripped to the short block. I managed to pull most of the vacuum hose rats nest off in one piece, as well as get the wiring loom off. I'm going to be going through the loom wire by wire before it goes back in - preventative on checking the wires, plus re-wrapping most of it. The protective wrapper of most of the loom is pretty crispy at this point. Not quite sure what the best option will be for re-wrapping. Does heat-shrink get brittle if exposed to continued heat?

I still have a few parts left that I can pull off - water pump, clutch, etc, but after that I'll be waiting on a bigger impact wrench to get the flywheel nut loose.

I can't believe how many places the block managed to leak either oil, water, fuel, or some horrible mix. I don't think it's a good sign that the exhaust ports of both rotors leaked a LOT of antifreeze.

Wednesday, February 17, 2010

M12 1.5 x70mm is harder to find that you'd think...

I thought I remembered autozone had a fair selection of metric hardware, so I stopped to try to find the bolts I needed to mount the engine to the stand I'm borrowing. Unfortunately they didn't have anything even close to what I needed.

Packed Riley up a little later in the weekend for a trip to Mclendon's, thinking a hardware store might have a better selection of metric bolts. I was able to find 2 m10 1.25 x70mm bolts, that will work for the upper mounts (where the power steering pump bracket bolts to the front housing). Still no bottom bolts. The person that helped at Mclendons suggested trying Tacoma Screw, but that Tacoma Screw is only open 7-5 m-f. Thankfully since daycare was closed for President's Day, I was working from home with Riley on Monday, and was able to run down and pick up the bolts before I started work for the day.

Monday evening, I sorted out a bracket solution that will work to mount a rotary to a generic engine stand, and got the engine mounted and off the hoist.

Saturday, February 6, 2010


The engine is finally out! I haven't been able to mount it to the stand yet, will need a few longer metric bolts to connect to Ron's stand, but engine is out, and transmission is off. Forgot just what it takes to pop the clutch release, but once I figured out the right order, it came off nice and easy. Probably not a good sign when there's rust forming on the pressure plate though.


Monday, February 1, 2010

Last weekend of January, engine's still in the car

Guess at this point I'm a couple weeks behind schedule, not that I really have much of a deadline set. Starting to get nervous about what this is going to end up costing when it's all said and done.

I've joked in the past about how that car seems as if the transmission was placed on a pedestal, then the rest of the car was built around it. I was reminded of that thought this weekend. I've decided to pull the engine and transmission together (good thing, since I found a small oil leak coming from the transmission) which means un-bolting the PPF. In order to remove the PPF, I had to remove 3 belly trays and 2 braces, plus remove the 4 very tightly torqued nuts. I broke a socket adapter in the first attempt, so after a run to sears for a impact deep socket (something I should have anyway, it's the same size as the lugnuts on all three cars) and a replacement for the adapter it was back home thinking I was done on the car for the night.

While I was cooking dinner, I had a thought of a workaround on my air gun problems (far too many quick connect options, and I'm still not fully set after 2 trips to sears) that after dinner I went out to try. The workaround seemed to be good, so I thought I would just give it a quick test, then go back in for the evening. The quick test worked so well, I found myself sucked back in, and it wasn't until a half hour later when Carissa came out to see what I was doing that I realized I'd been reabsorbed in working. On the plus side, the PPF is off the transmission, the fuel lines are disconnected, clutch hydraulics are off, and I just have to pull the starter wiring as the last piece connecting engine to body.

Guess it's time to line up another pair of hands to help out next weekend!